ZODI-YAK TRACK EVENT GUIDE

RuneScape has grown drastically over the years and has kept on inviting new players to visit the platform because of its eye-catching updates that include, quests, events, etc. Similarly, an event known as Zodi-Yak Track has caught the attention of players, but to know more about it, you’ll have to read through this guide. So, let’s begin.

Zodi-Yak Track

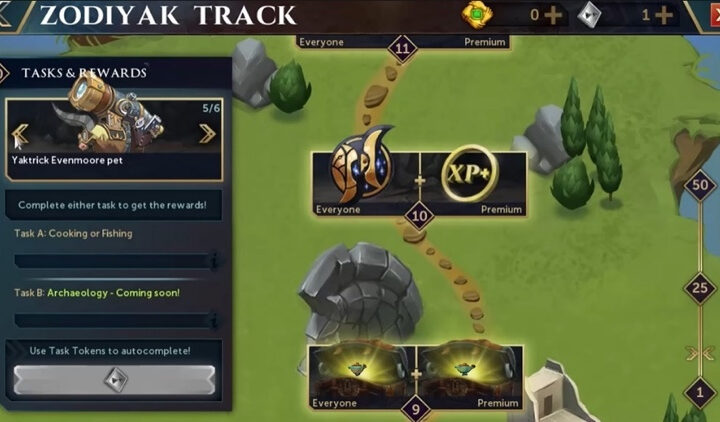
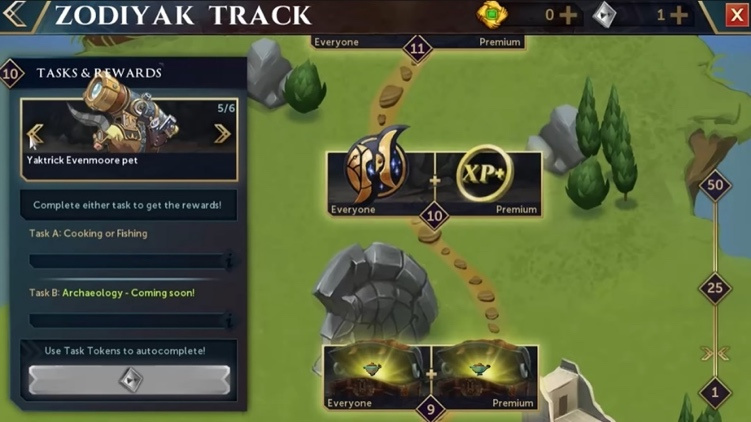
One of the most preferred playable events on RuneScape is the Zodi-Yak Track event, which was initially released on 23rd March 2020, and ran until 3rd May 2020. Players participating in this event are tasked to complete various activities and earn rewards. The rewards are divided between Free and Premium, and it’s quite obvious that the Premium track holds heftier rewards, as compared to the Free Track. You can purchase the Premier Pass by using two bonds or purchase to activate Premier Club membership by yourself.
How To Progress?

Whatever track you choose in the Yak Track, you’ll only be able to progress to the next tier by successfully completing the tasks. The tasks will entirely depend upon your level, and the type of account that you’re playing with; F2P (Free to play) or P2P (Pay to play). Being a F2P member of the game, you’ll only get tasks that focus on your available skills, whereas, P2P members will have the option of choosing free or paid skills. Zodi-Yak Track also has a join tasks option available, which displays two skill requirements in a single task, and the actions that you choose according to your preference will take your task further in either of the two displayed skills.

You can also skip the tasks by using a skip token, and at the initial phase, you’ll only have two skip tokens for the Yak Track. You can obviously buy more with the help of bonds and do remember, that you won’t need a higher level than the level displayed on the task. To find out the required items, you can check the information section in the Track List.

Gameplay

As we’ve already discussed that you’ll need to play the event and complete various tasks to progress further. Imagine a scenario where you’re given a tier-2 task on a F2P (Free to play) account, and you have level 99 in Woodcutting. You’re tasked to cut 115 Willow Trees. However, the players who have a woodcutting level of 45 are only tasked to cut the trees.

There are various variations of the given tasks that can also include items to complete them. It’s always important that you research which item would suit your skill level because you’ll have a number of options. However, for instance, there are a lot of cooking items that you can choose from, but it will entirely depend upon your level and the given task. In terms of cooking, it’s important to bring to light that only the items that have successfully been cooked will be counted in progression.
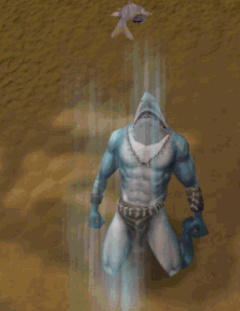
Speaking in terms of fishing, if you’re using a Shark’s Outfit to gain an advantage, it’ll definitely be counted towards your progression. You can also use the Dwarven Fish Extractor, but you won’t be able to use the perks of the furnace to gain an advantage during your task. Before moving ahead, it’s best that you research each skill that will be used, and always make sure that you have the items available beforehand.

Rewards

The reward table will consist of 50 tier progression rewards that you can earn during your track journey. The rewards can be anything from new items to cosmetics, and a plus point is that you can earn 8% and 6% additional experience in Agility and Herblore, respectively while progressing your tier levels. Being an Ironman, only the cosmetics rewards will be available to you. Another point to be noted is that if you buy a Premier Pass at a later stage, you’ll get each of the previous rewards on the Premier Pass reward table.

At a later stage, as you climb up in tier levels, you’ll start receiving lamps in the form of a reward. For instance, tier 47 will offer a Prismatic Lamp, Medium Prismatic Lamp, and Large Bonus Experience Star. The bonus experience stars will continue throughout until tier 50. If you have a Free Track account, you can get Weaver Teleport, Stargazer Goggle Cosmetic Override, and Bonus Experience, whereas, if you have a Premier Track account, you can get various Cosmetic Overrides like Sheratan Mercenary, Sheratan Shield Override, Cosmic Billy Pet, and Smouldering Lamps at tier level 50.

Source: Best Runescape Service Seller – RSOrder!

Continue Reading

D2R Druid Fury Werewolf Build

The Druid Fury Werewolf Build is the end game build that can get a player through nightmare and hell difficulty levels.

While playing as a Fury Werewolf character, you’ll often be shapeshifting into a strong Werewolf that can annihilate your enemy targets with melee attacks. You’ll be focusing on Fury for main damage output, followed by Feral Rage for personal buffs.

The Barbarian Whirlwind Build is intended for nightmare and hell difficulty levels that start around level 40. It’s recommended that you start off with the Fire Elementalist Build and then switch to Fury Werewolf at a later stage. If you’re already doing that, and you want to switch to this build, you can do it by claiming the ‘Den of Evil’ reward from the NPC named Kara (Rogue Encampment) for D2R Fury Werewolf Druid. You’ll get 3 re-specs and you’ll need to be on the same difficulty level to claim it.

Stat Distribution

Similar to most builds on the Diablo 2 Resurrected platform, the stat distribution for this build will focus on assigning the attribute points into Strength and Dexterity so that the equipment requirements can be met for D2R Fury Werewolf Druid. The remaining points will be added into Vitality for additional life points.

You’ll need to assign enough points in Strength to equip your equipment. It will entirely depend upon the gear that you’re using, as well as the additional Strength bonus you’re getting from it. Points in Dexterity for fury werewolf build will depend upon the type of weapon you’ll be using. The remaining points are going to be added in Vitality, and you don’t need to invest anything in Energy.

Important

If you have a Hellfire Touch and an Annihilus; it will greatly reduce your attribute points investment in Strength for fury werewolf build. Instead, you can utilize these two charms to obtain +10 to 20 points in every attribute and +10 to 20 points in Elemental Resistances. If you have both in your inventory, it’ll save about 20 to 40 stat points, which can then be used for Vitality to increase your health pool. The passive resistances that the charms offer will allow you to depend less on +All Resistance gear.

However, if you don’t have an Annihilus or a Hellfire Touch already, you need to stop what you’re doing and focus on obtaining them. The perfectly rolled ones are quite costly, but you can always opt for the bad ones at an affordable price, and then upgrade it when you have enough gold.

Skills

Werewolf transforms the character into a beast while increasing its Attack Speed, and Life & Attack rating. Lycanthropy increases max life, alongside the transformation time. Fury allows the character to damage with an increased Attack and Damage rating. Feral Rage is performed on a single target with enhanced Damage and Attack rating. Heart of Wolverine calls upon a Spirit to increase the entire party’s Attack and Damage rating. Summon Grizzly is an optional skill; however, it’s good because the bear acts as a meat shield for you and your mercenary.

Weapons, Armor, and Accessories

Lore (Runeword), Cerebus’ Bite/Spirit Keeper, Ribcracker (unique)/Crescent Moon (Runeword)/Kingslayer (Runeword), Stealth (Runeword)/Duress (Runeword), Gloves with defensive stats, Belt with Life and Resistances, Boots with Faster Walk or Run Speed, alongside Life and Resistances, Ring with Life, Stats, and Resistances, Amulet with Stats, Health, Resistances or additional Druid Skills, and Charms with additional Life, Resistances, Attack Rating, Damage, and Shapeshifting Skills for fury werewolf d2.

Max Level Equipment

Jalal’s Mane (Unique), Grief (Runeword) + Stormshield/Death (Runeword)/Breath of the Dying (Runeword), Call To Arms (Runeword) + Spirit Shield (Runeword), Fortitude (Runeword)/Chains of Honor (Runeword), Laying of Hands (Unique)/Dracul’s Grasp (Unique), Verdungo’s Hearty Cord (Unique), Gore Rider (Unique), 1x Bul-Kathos’ Wedding Band (Unique)/1x Raven Frost (Unique), and Highlord’s Wrath (Unique)/Mara’s Kaleidoscope (Unique) for fury werewolf d2.

Continue Reading

New World Builds: Sword & Shield Tank

The Sword & Shield Tank Build centers around tanking in dungeons and landscapes consisting of elite mobs or above. It offers excellent survivability skills due to the passive effects of the shield, as well as the ability to block dreadful attacks. In addition to that, it offers threat generation, which can drive the enemy’s focus towards you and protect the other party members. So, if you’re looking into a genuine tank build, then there’s no better option than to consider this guide.

Working of the build

You will lead with ‘Path of Destiny’ to drive the enemy’s attention towards you, and then immediately cast Shockwave to taunt them. But that’s only if you have a certain Carnelian Gem socketed into your hammer, which is a ‘must-have.’

After that, you can switch to Sword & Shield and attack, while utilizing Defiant Stance to taunt the enemies further away if you have to. Then again, it’s if you have a Carnelian Gem socketed into your sword, for this New World Sword and New World Shield Build. The remaining enemies can either be taunted or interrupted with the Shield Bash ability, followed by Reverse Stab to decrease the ability cooldowns of your Shield & Sword. It whoops about 25%, allowing you to quickly gain the casting opportunity.

Every trash pull needs to be followed using a similar pattern, but the bosses might slightly differ depending on how they attack or approach you. For instance, if it’s a single boss, then you’ll likely lead with Path of Destiny, followed by Taunt or Shield Bash, and then finally Defiant Stance and Reverse Stab. You can always utilize Armor Breaker to de-buff the boss, causing it to increase the damage inflicted by the party members. Later on, you can hit the boss with Shockwave to taunt it, while switching back to Sword & Shield attacks.

Attributes

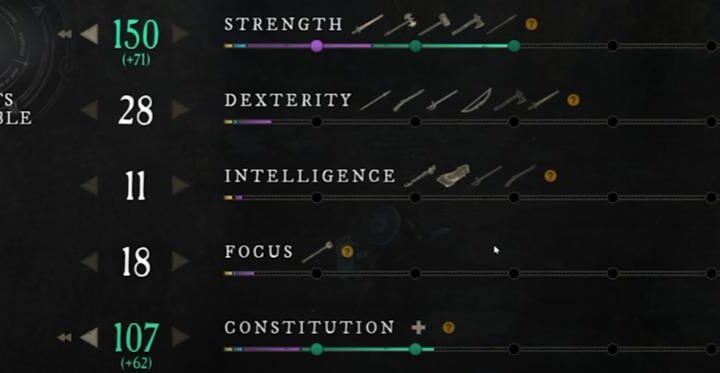
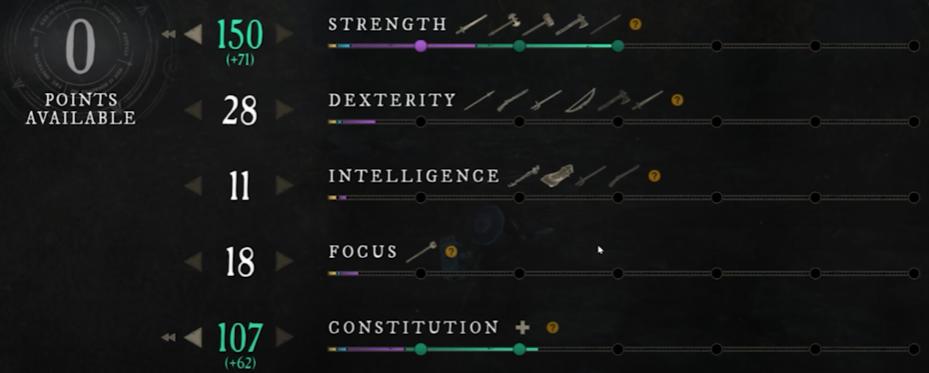
The attributes distribution for this build is quite simple since both the weapons; scale with Strength. The only thing you need to be mindful of is adding some points to Constitution as you will be dealing with damage quite often. Higher-strength means higher DPS, which can easily speed up the pulls.

Sword & Shield Skills

Shield Bash

Shield Bash offers a single-target taunt and helps maintain control on mini-bosses and bosses, while also stunning some of them for this New World Sword and New World Shield Build. You can use it to interrupt attacks and make sure that you use it whenever it is off cooldown mode so you can keep the boss on AGGRO, thus preventing it from attacking the other party members.

Defiant Stance

Defiant Stance is an AOE taunt that not only buffs your defense, but makes it significantly difficult to kill you. You can utilize it to pull in trash mobs and keep them on you until the actual enemy dies.

Reverse Stab

Reverse Stab’s final upgrade permits you to reduce the overall cooldown of your Sword & Shield skills by 25%. It shaves about 5 seconds off of Defiant Stance, while also transferring negative effects onto the boss if this perk is on your equipment.

Warhammer Skills

Shockwave

Shockwave is another AOE taunt, which also stuns the enemy target, preventing from causing any unnecessary damage to the party members. It’s a good ability to utilize when you’re around by enemies full of AGGRO, as well as to gain distance to get back on track when the target is stunned.

Armor Breaker

Armor Breaker is a skill you would want to use to de-buff bosses who have Lasting Trauma passive abilities for this New World Tank Build. It reduces their overall protection by 15%, while greatly increasing the damage output of your party.

Path of Destiny

Path of Destiny isn’t that important to utilize, but you can opt for what you like. The reason why it’s on the list is that it permits you to AOE from a distance, while you approach closer and land hits on them. It offers a little more AGGRO than if you don’t utilize it.

Weapons & Armor

The only two weapons that you need for this build are a Hammer and Sword, but alongside that, it’s recommended to have a good shield. Both the weapons will need sockets on them, specifically named Carnelian Gems, as it helps generate thread with your skills.

Since you will be equipped with a complete Heavy Armor with this build to maximize the protection, look out for equipment with Strength and Constitution attributes in them (similar to your weapons), and if you’re having trouble finding some, you can purchase a few good types of equipment from your respective faction vendors. Also, make sure that you purchase good jewelry with the Stamina attribute or something that offers your Stamina every once in a while, to help your block the incoming attacks more often.

Continue Reading

OSRS Lunar Diplomacy Guide

Lunar Diplomacy takes you on an adventure involving the strife between the Moon Clan and the Fremennik. You’ll gain a number of rewards upon completing the quest, including anytime access to the Lunar Isle and a new spell book!

Quest Requirements

First, you’ll need to get the following skill levels to proceed. 5 Herblore, 40 Defense, 49 Fire Making, 55 Woodcutting, 60 Mining, 61 Crafting, and 65 Magic. You’ll also need enough combat stats to kill several level 111 beasts, along with access to Air, Water, Earth, and Fire Altars.

You can only begin the quest after completing the following quests. Druidic Ritual, Jungle Potion, Rune Mysteries, Lost City, Shilo Village, and The Fremennik Trials.

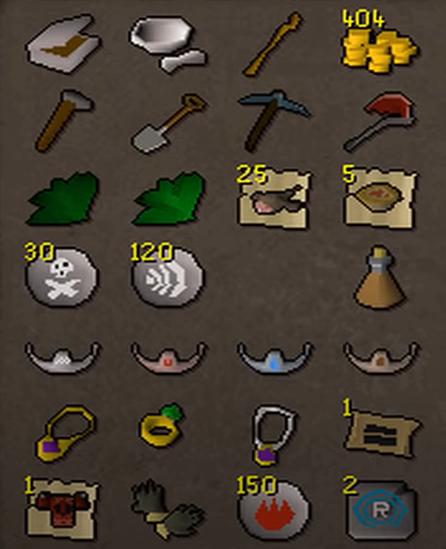
Moving to the items required, you’ll need the following. Hammer, Pestle & Mortar, Marrentill, Gaum Leaf, 1,000 OSRS Gold, Tinderbox, Needle, Axe, Pickaxe, Space, 2x Spools of Thread, Swamp Tar, Dramen Staff, 4 Elemental Talismans/Tiaras (Air | Water | Earth | Fire), and Combat Gear.

Walkthrough

Start the quest by taking your Tinderbox to Rellekka and speaking to the NPC named Lokar Searunner. You can find him wandering on the western docks. He’ll tell you all there is to know about the Moon Clan.

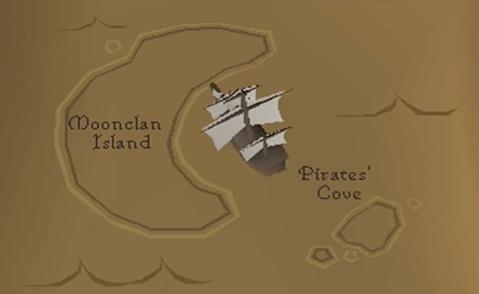
Next, head to the Longhall and speak to Brundt the Chieftain, who’ll give you a Seal of Passage. Keep this item on you at all times until the end. Now, head back to Lokar to sail to the Pirates’ Cove.

The Ship

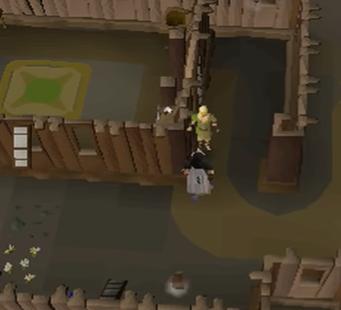
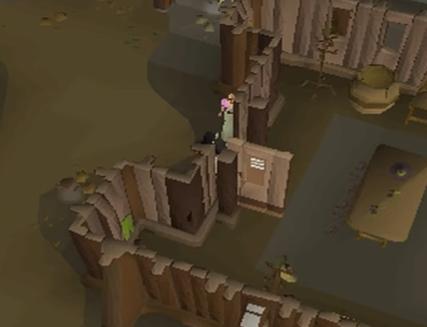
Here, you’ll find a naval vessel called Lazy Zay. You need to get onto it and speak to Captain Bentley Be aware of Pirates and Moss Giants wandering around as they’ll attack you. As the ship begins sailing, head to the lower deck and speak to Birds-Eye Jack.

There’s a lot of back and forth here. Go back to the captain now, and then back to Jack. Finally, back again and Bentley will ask you to speak to the other crew members on the ship.

On the same deck, you’ll find Eagle-Eye Schultz. Speak to him and he’ll give you more info on the Jinxes. Next, go one deck up to speak to the Cabin Boy, followed by Beefy Burns on the bottom deck.

Speak to Lecherous Lee who can be found on the same deck as the Cabin Boy, and then head back to the captain’s deck to speak to First Mate Davey-Boy. Finally, speak to the Cabin Boy once again to put the stories together.

The 5 Symbols

Now, light your Emerald Lantern using a Tinderbox. Grab Swamp Tar from the bottom deck (if you don’t already have it) and start wiping away the 5 symbols.

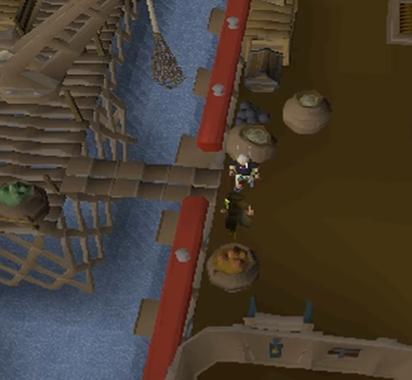
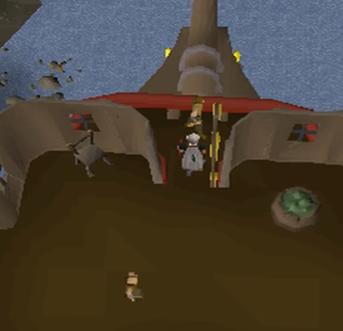
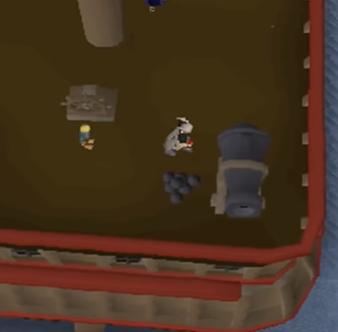
The first is on the cannon east of the Cabin Boy. The second is on a wall chart northeast (Captain’s Deck). The third is near the stairs on the bottom deck. The fourth is near the cook on a create (same deck). And, the fifth is on a support column (same deck).

Once you have all the symbols, speak to the Bentley and set sail for the Moon Clan Island. Head southwest of the island to speak to Meteora, who will ask you to visit the Oneiromancer for further help.

The Potion

The Oneiromancer is by the Astral Altar. He’ll ask you to collect a number of items in an order. First on the list is the Waking Sleep Potion. For this, you’ll need Marrentill, Guam Leaf, Suqah Tooth, and Pestle & Mortar. For the bottle, speak to Baba Yaga in the village (chicken house).

Start by filling the vial with water, and then head southeast to kill a Suqah for its tooth. Take its hide too as you’ll need it later. Use the tooth on a Pestle & Mortar and then add all the items into the vial. Finally, take the potion to the Oneiromancer.

Lunar Staff

Grab your Dramen Staff along with the 4 Elemental Talismans/Tiaras. Take the staff to each of the four Elemental Altars and use it in the following order: Air, Fire, Water, and Earth. You won’t be able to wield the Lunar Staff without Ceremonial Clothes. So, that’s pretty much the next part.

Ceremonial Clothes

For the helm, travel to the northeastern part of the dungeon on the island. Mine a Lunar Ore using a Pickaxe, and then take it to the furnace area in Rellekka to smith it using a Hammer.

For the Cape, head northwest of the village and speak to Pauline Polaris. She’ll give it to you if you guess her name right. The first guess will be Pauline, and then she’ll give you a clue. Choose Jane Blud-Hagic-Maid to get it right.

For the Amulet, go back to Meteora, who is more than willing to trade the Amulet to you for a Tiara she lost earlier to a Suqah. Kill a few Suqahs, until one drops it, and then gives it to her in exchange for the Amulet.

For the Torso, Gloves, Legs, and Boots, speak to Rimae Sirsalis in the clothes shop. With the hides you have gathered by killing Suqahs, you can have them tanned for 400 OSRS GP. After that, simply use a Needle & Thread to craft the items.

For the final item, the right, head to the center of the village to speak to Selene. She’ll give you a riddle, after which you need to grab a Spade and go to the bottom of the village. Here you’ll find a bridge to the left. You have to dig in the area where there are Blue Flowers to obtain the Ring.

Finally, take all the items back to the Oneiromancer and get ready to enter the Dream World.

The Dream World

Upon entering the Dream World, go to the middle and speak to either the Ethereal Man or Lady. They’ll ask you to solve 6 Puzzles before taking on the ultimate challenge. Each puzzle can be accessed through the portals. Do remember that you need to speak to one of the two characters every time you complete a puzzle.

Puzzle #1 (Ethereal Fluke)

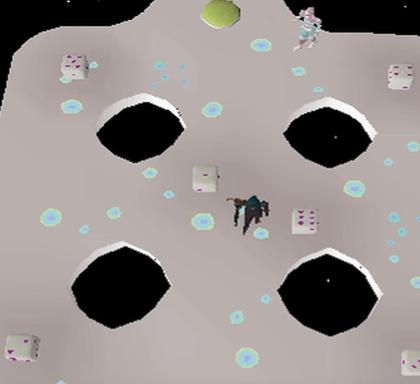
Access the first puzzle by entering the southwest portal. It’s a dice game, with the center one having 1 or 6, the eastern one having 4 or 3, and the western one having 5 or 2 number combinations. The objective is to add up to the numbers given by the Guide. Once done, head outside, speak to one of the Guides, and continue ahead.

Puzzle #2 (Ethereal Numerator)

Access the second puzzle by entering the southeast portal. You’ll have to press on the floating numbers in the correct order. There’ll be numbers missing from the sequence. For instance, numbers 1,4,2,5 would have 3 and 6 MISSING. So, you press on 3 first, and then 6.

Puzzle #3 (Ethereal Perceptive)

Access the third puzzle by entering the northeast portal. It’s a Woodcutting game where you have to beat the Ethereal in chopping down more wood. The first one to deposit 20 Logs in the pile wins.

Puzzle #4 (Ethereal Memory Test)

Access the fourth puzzle by entering the northwest portal. It’s a memory test where you need to hop between platforms to show how sharp you are. Make sure you avoid fake platforms.

Puzzle #5 (Ethereal Hurdle Race)

The fifth puzzle is a test of Agility. It’s quite easy if you have an Agility Potion on you (unless you’re maxed out). Anyways, you need to leap over 4 hurdles to win the game. Simple objective, isn’t it? Make sure you don’t fail because you’ll deal damage from the fall.

Puzzle #6 (Ethereal Mimic)

In the sixth challenge, you simply have to mimic what your opponent does to complete it. The Ethereal will either nod to indicate you are correct or shake its head to indicate that your actions were wrong.

The Boss

Once you have overcome all the challenges, go back to the center and speak to the guide. He’ll ask if you’re ready for the ultimate challenge, who is a level 79 enemy identical to you and your stats. The battle is pretty easy.

Once defeated, speak to the guide again to leave the Dream World. Finally, speak to the Oneiromancer to complete the quest. Congratulations!

Continue Reading

The Top 10 F2p Monsters to Train On

  1. Lesser demons (Level 82) – Karamja Volcano (or Crandor Island) These demons have a low attack and defense level, have around 80 hp but can hit 8s without any weapons. They have relatively good drops and give great xp for mid to high level players, usually dropping from 40gp up to a rune med helm (usually happens once every 200 kills or so). There are several hiding spots for mages and rangers to use and the demons will become non-aggressive after around 10 minutes. If there are too many people, you can switch worlds or go to a german server (usually with 50-500 people).
  2. Moss giants (Level 42)- Eastern Ruins (Level 30 wilderness), Crandor Island, or Varrock Sewers

Moss giants are usually level 42 but can still hit up to 5s. They always drop big bones (worth around 300gp each) and can also drop black kiteshields, mithril stuff, magic runes, and a few other items. It is however not recommended that you go into the wilderness because of the revenants that can annoy you or even easily kill you (level 7 revenant imps can hit 8s!).

  1. Cockroach Soldiers (Level 81) – Stronghold of Player Safety

These are level 81 but are way stronger than lesser demons. They can hit up to 13s and will use whatever you use at it, so it’ll range you if you range, it’ll mage you if you use mage, and it can also melee you. However they have very high defense and are recommended for only very high leveled players but can drop a couple different rune items, magic runes, etc. Fortunately, they are not aggressive, unlike the lesser demons and moss giants mentioned earlier.

  1. Hill giants (Level 28) – Edgeville Dungeon

Unlike the previous three, hill giants are a low level 28 but still drop big bones every single time, like the moss giants. They can also drop limpwurt roots, other steel items, runes, and various cheap items. Like before, if it is crowded, then change worlds, preferably onto one of the German servers.

  1. Minotaurs (Level 10 – 12) – Strong of of Security first level

Minotaurs are great training for low-leveled players, especially those using ranged because you can usually end up with more iron arrows picked up from the minotaurs than you started with. They have around 10 hp and drop cheap runes, coins, iron arrows, etc.

  1. Hobgoblins (Level 28 and 42) – Southwest of Melzar’s Maze

Hobgoblins can be found along the water near Melzar’s Maze. They can drop several steel items, 1-150 coins, or a few runes (including law runes, cosmic runes, fire runes, water runes, chaos runes, nature runes, etc.).

  1. Al-kharid Warriors (Level 9) – Al-Karid

These are level 9 but have 19 hp. If you attack one of them, others will come and team up on you if they can see you because the area is a multi-combat zone.

  1. Goblins (Levels 2 – 25) – Almost Anywhere

Lumbridge has quite a lot of goblins. Again, it can be crowded, so switch worlds if many low-leveled players waste your time there.

  1. Cows (Level 2) – Lumbridge East cow pen or South Falador

Cows are only level 2, but have 8 hp. They drop cowhides which can sell for around 100gp off players and the grand exchange making them great for making money for low-leveled players.

  1. Chickens (Level 1)- South Faldador or Lumbridge chicken pen

Chickens have only 3 hp but the feathers dropped can sell for 4-5 gp each. However, unlike the cowhide dropped from cows, feathers are stackable, so you can carry as many as you want with you without having to bank them.

Continue Reading