Diablo 4 Fields of Judgment Guide: Location, Urivar Boss Fight, and Loot Breakdown

Diablo 4’s Fields of Judgment is a compact yet highly rewarding mini-dungeon introduced with the Vessel of Hatred expansion. While it is home to Urivar, one of the game’s lower-tier LairBosses playerss should not underestimate the encounter, especially on higher Torment difficulties. With proper preparation, solid knowledge of the mechanics, and well-optimized Diablo 4 Items, Urivar is fully soloable by every class and extremely efficient to farm.

In this guide, we’ll cover where to find the Fields of Judgment, how to defeat Urivar, and a full breakdown of his loot table, including why this dungeon deserves a permanent spot in your endgame farming rotation.

Where to Find the Fields of Judgment in Diablo 4

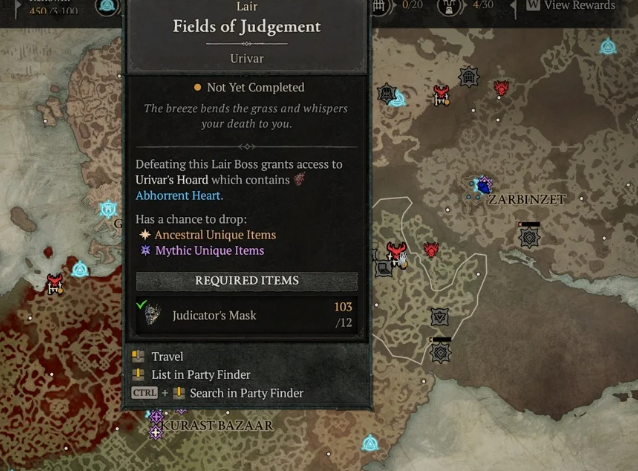
The Fields of Judgment dungeon is located in the Teganze Plateau within the Nahantu region. While the area lacks major towns, players who have completed the Kichuk Stronghold in northeastern Nahantu gain access to a convenient nearby fast-travel point.

If Kichuk isn’t unlocked yet, you still have several ways to reach the dungeon:

·Fast travel to Caves of Kutokue

·Fast travel to Farai Cliffs

·Ride directly to the dungeon entrance

·Unlock direct fast travel after discovering the Fields of Judgment once

The dungeon itself is very short. Despite slight path randomization, it always funnels you quickly toward the Urivar encounter. This makes it an excellent choice for targeted farming runs where time efficiency matters.

Important requirements:

·You must own the Vessel of Hatred expansion

·You must be playing on Torment difficulty

Without meeting both conditions, the dungeon and Urivar will remain inaccessible.

How to Beat Urivar in Diablo 4

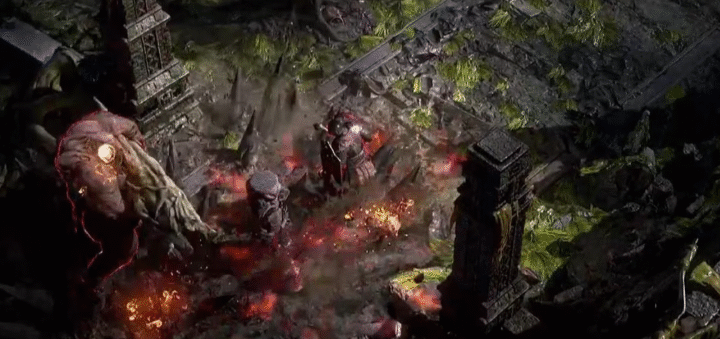
Urivar opens the fight by descending into the center of the arena and summoning knights around the perimeter. These knights throw fiery spears that leave burning trails and briefly apply poison damage. As a result, Fire Resistance is extremely valuable, particularly on Torment 3 and Torment 4.

Urivar’s Key Attacks

Urivar’s mechanics are clearly telegraphed but scale aggressively with difficulty:

·Rain of Spears that tracks player movement

·Charging sword attack that leaves three holy damage trails

·Holy beam tether that slows you while summoning incoming spears

On higher Torment tiers, these attacks can overlap and overwhelm even tanky builds. Mobility, positioning, and arena awareness are critical to survival.

Phase Changes and Damage Skips

At roughly 50% health, Urivar vanishes and forces players to defeat waves of summoned knights. However, this phase can often be skipped entirely with enough early burst damage.

Urivar does not become fully invulnerable; instead, he gains a shield. If you break this shield quickly, you can bypass entire phases of the fight. This is where optimized builds and high-end Diablo 4 Items truly shine, turning a multi-phase encounter into a brief burst window.

In the final phase, Urivar spawns Holy Circles on the ground that deal massive damage if touched. Once again, strong damage builds can skip this phase completely by burning him down early.

Group play trivializes the fight even further, making Fields of Judgment an excellent co-op farming dungeon.

Loot Requirements: Judicator’s Masks

Defeating Urivar alone does not grant loot. To open his reward chest, you’ll need:

·12× Judicator’s Masks

These can be obtained from:

·Tree of Whispers caches

·World Bosses

·Mercenary Bartering

For players short on time, many choose to buy Diablo 4 materials to maintain uninterrupted farming loops, especially when chaining multiple Urivar runs in a single session.

Urivar Loot Table and Rewards

Urivar offers excellent rewards relative to his difficulty, making him an efficient target for both gearing alts and chasing specific Uniques.

Guaranteed Drops by Torment Level

·Torment 1: 3 Uniques, 1 Rune

·Torment 2: 4 Uniques, 1 Rune

·Torment 3: 5 Uniques, 1 Rune

·Torment 4: 7 Uniques, 1 Rune

Additional possible drops include:

·Stygian Stones (used to craft higher-tier boss materials)

·Abhorrent Hearts (required to summon the Harbinger of Hatred)

Group play provides bonus loot, further increasing efficiency for organized farming parties.

Mini Belial Encounter and Betrayer’s Husks

After opening Urivar’s chest, there is a chance for a Mini Belial encounter to spawn. This bonus fight drops additional loot and is currently the only source of Betrayer’s Husks, which are required to access the Belial Pinnacle Boss.

For players pushing pinnacle content or min-maxing their endgame builds, this alone makes Fields of Judgment worth repeated runs.

Final Thoughts: Is Fields of Judgment Worth Farming?

Absolutely. The Fields of Judgment delivers:

·Short, repeatable, clear times

·Predictable and manageable boss mechanics

·High Unique item density

·Reliable access to endgame summoning materials

Whether you’re upgrading gear, stockpiling crafting components, or preparing for pinnacle boss encounters, this dungeon fits neatly into any Torment-level farming route. With strong builds and properly optimized Diablo 4 Items, Urivar becomes less of a threat and more of a reliable lootsource, especially for players willing to buy Diablo 4 materials to keep the grind fast, consistent, and efficient.

Continue Reading

Path of Exile:How Reflecting Mist Works and Where to Find It

Reflecting Mist is one of the standout additions in the Settlers of Kalguur expansion, offering a unique spin on item crafting unlike anything previously seen in Path of Exile. While most crafting currencies tweak or reroll a specific part of an item, Reflecting Mist lets you create a duplicated version of a rare ring or amulet-but the copy always comes with unexpected changes.

This mechanic blends high-stakes gambling with endgame item optimization, turning Reflecting Mist into one of the most coveted crafting tools in the league.

Reflecting Mist can be used only on rare amulets and rare rings. When you apply it, the game produces a Reflected version of the item, but the copy is not identical. Instead, its modifiers undergo a transformation that can either elevate the item to greatness or doom it into a disaster piece.Don’t let currency shortages hold you back—get your POE currency on MMOexp now and thrive!

Once the reflection is complete, the new item becomes Mirrored, which means it cannot be crafted on, modified, or corrupted. Whatever you get is final.

This makes Reflecting Mist both exhilarating and terrifying-its unpredictability is its charm.

How to Get Reflecting Mist in Path of Exile

Reflecting Mist is intentionally rare. Expect to invest plenty of time or currency if you’re hunting for one. These are the currently confirmed ways to acquire it.

  1. High-Tier Maps (T16+) – Random Mist Encounters

Your most organic source of Reflecting Mist comes from simply running Tier 16 or higher maps. Occasionally, you’ll see a notification that a Mist has appeared somewhere on the map. Approaching it triggers one of two possible outcomes:

You immediately reflect a piece of jewelry on the spot

You receive a Reflecting Mist item as a drop

The first scenario is common; the second is extremely uncommon. You may encounter dozens of Mists before ever seeing the actual currency drop.

If you’re trying to maximize Mist appearances:

Chain fast T16 maps with strong layouts (Strand, Dunes, Cemetery, Crimson Temple)

Use heavy juice:Delirium, Scarab farming, Altar strategies

Maintain high pack density

This is the best long-term farming method, but RNG plays a major role.

  1. Divination Cards – The Most Consistent Method

For players who prefer stability over randomness, Divination Cards are your safest bet. A full set of The Lake awards one Reflecting Mist.

To farm Divination Cards effectively:

Take Atlas passives that increase Diviner’s Strongbox spawns

Roll maps with Strongbox modifiers and pack size

Use Ambush Scarabs

Use sextants that guarantee or amplify Strongboxes

You’ll still be relying on RNG, but card farming provides a predictable path toward accumulating Mists over time. In the current meta, it’s also quite profitable compared to other deterministic farming styles.

  1. The Trade Market – Instant but Expensive

If farming isn’t your style, the easiest option is always trading. Through the cheap Path of exile currency Exchange system, you can simply buy Reflecting Mist from other players.

Typical price at the time of writing:

1 Reflecting Mist ≈ 19 Divine Orbs

Prices shift depending on league economy, but the Mist consistently holds a premium due to its scarcity and power. For many players, buying one outright is more efficient than spending hours in T16 farms.

How to Use Reflecting Mist

Using Reflecting Mist is simple-understanding its consequences is the hard part.

How to apply it:

Make sure you have a rare ring or rare amulet as your target.

Right-click the Reflecting Mist.

Left-click the jewelry you want to duplicate.

A new Reflected, Mirrored version appears in your inventory.

You can’t undo this. The reflected item cannot be changed in any way afterward-no crafting, no corruptions, no quality, nothing.

What changes on the reflected version?

These stay the same:

Base type

Implicit modifier

All prefixes and suffixes

These can change dramatically:

Every mod’s numerical value

Some mods may flip into negative versions

Reflecting Mist is essentially a high-stakes roll where your current jewelry becomes the template for an upgraded-or downgraded-variant.

Should You Use Reflecting Mist?

Reflecting Mist is not designed for casual or early-game play. It’s meant for players who:

Are deep into endgame crafting

Have valuable jewelry worth risking

Enjoy min-maxing

Have spare currency

Want to push an item beyond its normal limits

If you’re the kind of exile who buys high-end amulets, invests in precision crafting, or loves squeezing every last bit of power from your build, Reflecting Mist is exactly the kind of gamble you’ll enjoy.

But be warned:the item may end up ruined, improved, or transformed into a weird hybrid of both.

Reflecting Mist brings a thrilling new layer of risk-reward crafting to Path of Exile. Whether you obtain it through T16 mapping, Divination Card farming, or the trade market, this currency stands as one of the most powerful tools for pushing jewelry to extraordinary heights.

Continue Reading

Black Ops 7 Zombies: Best Tips for Unlocking the Good Soldiers Achievement

Black Ops 7’s Ashes of the Damned map hides dozens of secrets, but one of the most memorable is the Good Soldiers achievement. This character-specific easter egg dives into Tank Dempsey’s past, delivering a spooky, emotional mini-quest with free loot and a guaranteed achievement unlock once completed correctly. Although the sequence is short, it’s easy to miss key steps-especially if you aren’t using the right Operator.

This guide breaks down everything you need to know to unlock the Good Soldiers trophy in BO7 Zombies, including requirements, a clear step-by-step walkthrough, troubleshooting advice, and a few optimization tips to help you complete it faster.

What You Need Before Starting

Before activating the easter egg, make sure you’re fully prepared:

·Operator Requirement: You must be playing as Dempsey. This quest will not trigger for any other character.

·Map: Ashes of the Damned in Zombies mode.

·Optional Power-Leveling Tip: If you want to gear up faster before attempting the quest, many players use Call of Duty Black Ops 7 Bot Lobbies, and some even buy CoD Black Ops 7 Bot Lobbies to quickly level weapons, perks, and loadouts. A stronger setup makes the trial phase smoother.

Good Soldiers Achievement – Quick Summary

If you want the ultra-fast overview, here it is:

1. Play as Dempsey.

2. Drive Ol’ Tessie from Ashwood toward the Zarya Cosmodrome.

3. Stop at the Crashed Rocket on the southeast path.

4. Interact with the dog tags near the three charred corpses.

5. Enter the vision realm, follow the black orb, and kill zombies.

6. Transform into a Disciple, wipe out the final wave, and finish the trial.

7. Return to the main map, loot rewards, and the Good Soldiers trophy will pop.

Now let’s break down each step in detail.

Step-by-Step Walkthrough

1. Select Dempsey and Load Into Ashes of the Damned

This easter egg is completely character-locked. If you’re not using Dempsey, nothing will happen-not the dog tags, not the cutscene, not the vision. Before starting your run, set Dempsey as your Operator and then load into Ashes of the Damned.

2. Travel to the Crashed Rocket (Southeast of Ashwood)

Spawn into the map, hop into Ol’ Tessie, and begin driving from Ashwood toward the Zarya Cosmodrome. On the southeast route, you’ll reach a location labelled Crashed Rocket. Park nearby and look for:

·Snow-covered debris

·A destroyed rocket shell

·Three charred body outlines on the ground

This is your trigger site.

3. Interact With the Dog Tags

Near the burned corpses, you’ll find a pair of Dempsey’s dog tags lying in the snow. Hold the Reload/Interact button when prompted.

This will:

·Trigger a short cutscene

·Pull Dempsey into a supernatural vision

·Start the Good Soldiers achievement sequence

If nothing happens, you’re either not Dempsey or you’re not standing in the correct spot.

4. Enter the Vision: Follow the Floating Black Orb

You’ll be teleported into a foggy, ghostly realm filled with echoes of Dempsey’s memories. A floating black orb will appear and begin drifting forward.

Your job:

·Follow the orb closely

·Kill every wave of zombies, which leads you to

·Stay mobile-zombies spawn aggressively in this phase

Typically, you’ll complete three follow-and-fight cycles before the scene escalates.

5. Transform Into a Disciple and Finish the Trial

Near the end of the vision, the Veytharion (the unseen guide of this realm) completes the ritual. You’ll suddenly transform into a Disciple, gaining temporary supernatural abilities.

Use your new powers to:

·Eliminate the final group of zombies

·Maintain control as the enemies become slightly faster

·Finish the scripted combat sequence

Once the last zombie is down, the vision fades, and you’re transported back to the real map.

6. Claim Your Rewards and Confirm the Trophy

You’ll spawn back at the Crashed Rocket, where loot automatically appears, including:

·Salvage

·Essence

·Rare and Legendary items

·Occasional Wonder Weapon components or scorestreaks

At this moment, the Good Soldiers achievement should unlock. If it doesn’t:

·Confirm you were playing as Dempsey

·Make sure you completed the Disciple kills

·Ensure the full scripted sequence played out without interruptions

Tips & Troubleshooting

Dempsey Only

If you don’t see the dog tags, the cause is almost always that you’re not using Dempsey. Switch Operators and restart.

Clear the Crash Area First

Zombies wandering too close before the interaction can sometimes interrupt the trigger or cause you to take damage during the cutscene.

Team Support Helps

Only the Dempsey player enters the vision, but teammates can:

·Hold off zombies in the main map

·Help keep the area safe

·Collect loot once the event ends

Round Difficulty Scaling

Depending on your round, the vision zombies may hit harder and appear in larger numbers. Late-round runs require sharper movement and upgraded weapons.

Why the Good Soldiers Easter Egg Is Worth Doing

Even though the sequence is short, it’s one of the most memorable moments in Black Ops 7 Zombies. Completing it gives you:

·Emotional story depth for Dempsey

·A creepy, atmospheric mini-quest from the classic Aether era

·Free mid-game loot

·A quick and easy character-specific achievement

·A satisfying break from standard round-based grinding

Whether you’re completing everything organically or powering through progression using Call of Duty Black Ops 7 Bot Lobbies to save time, the Good Soldiers trophy is absolutely worth checking off your list.

Continue Reading

Path of Exile 2: Forge Hammer, Totem Army, and Thorns Reflect Guide

With its balance of offense, defense, and utility, Warbringer stands as one of the most complete and resilient Ascendancies in Path of Exile 2. It offers the kind of flexibility few others can match – whether you want to play an explosive melee bruiser, command fiery ancestral spirits, or turn damage taken into a weapon. Even better, it’s surprisingly affordable. You can comfortably clear Tier 15 maps with around 20 Divines’ worth of Path of Exile 2 Items, making Warbringer one of the most cost-efficient endgame options available in The Third Edict expansion.

In this guide, we’ll break down everything you need to know about Warbringer – including its pros and cons, and three top-performing builds that make the most of its warcry-based mechanics.

Pros and Cons of Playing Warbringer in Path of Exile 2

Before diving into builds, it’s important to understand what makes Warbringer strong – and where it falls short. This Ascendancy revolves around sustain, scaling, and synergy, with innate defenses that can rival Juggernauts and enough offensive power to compete with Berserkers.

Pros:

·Extremely tanky, boasting up to 80% Physical and Elemental damage mitigation.

·Cheap to build and easy to scale into endgame content.

·Excellent synergy with minions, totems, and Warcry mechanics.

·Capable of killing pinnacle bosses like Kitava, the Pale Court, and early Atlas Guardians.

Cons:

·Slower movement speed compared to other Ascendancies.

·Heavy particle effects from Warcry chains can reduce performance on lower-end PCs.

If you can handle the slightly slower pace, Warbringer rewards you with one of the most satisfying and survivable playstyles in the game.

1. Forge Hammer Warbringer – The Volcanic Slayer

The Forge Hammer Warbringer is one of the most iconic builds introduced in The Third Edict. It revolves around Forge Hammer, a new skill that lets you throw a molten hammer, which detonates in fiery explosions when triggered by a Warcry. Combined with Fist of War and Fire Attunement, this build turns you into a walking volcano.

Main Skills Used:

·Forge Hammer: Rageforged – Fist of War – Fire Attunement – Elemental Armament

·Shockwave Totem: Overabundance – Urgent Totems – Rapid Attacks – Magnified Area – Font of Blood

·Ancestral Cry: Prolonged Duration – Close Combat – Fire Penetration – Immolate – Elemental Armament

·War Banner: Cannibalism – Magnified Area – Daresso’s Passion – Prolonged Duration

Recommended Unique:

·Chernobog’s Pillar (optional but synergistic with fire conversion)

Gameplay Loop:

Throw your Forge Hammer, then Warcry to detonate it into cascading volcanic eruptions. Your Shockwave Totems amplify the explosions, while War Banner builds “Glory” stacks that fuel Ancestral Cry for even more fire damage.

This setup delivers a constant cycle of detonations and buffs, resulting in both high damage and strong survivability. With Chernobog’s Pillar, you gain extra resistances and smoother scaling for late maps. If you like melee builds that feel explosive and cinematic, this one is unmatched.

2. Ancestral Totem Warbringer – The Army of Fire

The Ancestral Totem Warbringer build caters to players who enjoy commanding spectral warriors instead of fighting directly. This unique hybrid between a minion commander and a battle shaman uses Warcries to summon fiery spirit totems that attack in sync with your character.

Main Skills Used:

·Ancestral Warrior Totem: Earthshatter – Branching Fissures – Fire Attunement – Urgent Totems – Rage

·Infernal Cry: Raging Cry – Swift Affliction – Second Wind – Brutality – Corrupting Cry

·Seismic Cry: Execute – Elemental Focus – Astral Projection – Magnified Area

·Fortifying Cry: Raging Cry – Second Wind – Astral Projection

Recommended Uniques:

·Hateforge (preferably with “Gain three random charges” modifier)

·Constricting Command (optional)

How It Works:

Each Warcry consumes charges and Rage to summon spectral warriors through the Ancestral Totem skill. The Hateforge’s unique converts these charges into burst fire damage, creating a constant rhythm of summons and explosions.

Thanks to Warbringer’s Ancestral Spirit passive, your totems duplicate themselves, effectively doubling your minion army. Combined with Earthshatter and Cry detonations, the screen becomes filled with spikes, fire, and spiritual chaos. You stay safely behind the totems while they eviscerate enemies.

This build is visually spectacular, efficient in both mapping and bossing, and offers a rare playstyle that blends summoner control with Warcry power.

3. Thorns Warbringer – The Reflective Juggernaut

For off-meta enthusiasts, the Thorns Warbringer offers a refreshing twist: instead of avoiding damage, you invite it. Every hit you take reflects a lethal burst of damage back at enemies, turning your tankiness into an offensive weapon.

Main Skills Used:

·Rapid Assault: Barbs – Quill Burst – Rapid Attacks – Ancestral Call

·Fortifying Cry: Raging Cry – Cooldown Recovery – Physical Mastery

·Time of Need: Thornskin

·Scavenged Plating: Thornskin – Prolonged Duration – Physical Mastery

Recommended Uniques:

·Crown of the Pale King

·The Brass Dome

Playstyle:

This build thrives on counterattack mechanics. Every time you’re hit, Crown of the Pale King triggers Thornstrike, dealing a wave of reflected damage. The Brass Dome maximizes armor and physical mitigation, allowing you to stand your ground even in front of map bosses.

Combine this with the Anvil’s Weight Ascendancy passive, and your Rapid Assault skill will shred enemy armor while triggering counter-hits that vaporize entire packs. It’s slower and more methodical than other builds, but the satisfaction of watching monsters die by attacking you is unmatched.

Final Thoughts – The Rise of the Warcry Meta

Patch The Third Edict solidified Warbringer as one of the premier endgame Ascendancies in Path of Exile 2. What used to be a niche tank option has evolved into a dynamic powerhouse capable of clearing maps and crushing bosses with creative build options.

Whether you prefer explosive melee slams, totem armies, or reflect-based defense, there’s a Warbringer variant that fits your playstyle. It’s budget-friendly, durable, and scales impressively with just a few crafted upgrades.

If you’re ready to embrace the new Warcry meta and carve your way through Wraeclast without breaking the bank, the Warbringer is your go-to Ascendancy. For smoother progression and faster gearing, don’t forget to buy Path of Exile 2 Currency safely to optimize your Warbringer build and start dominating endgame content today.

Continue Reading

Path of Exile 2:A Complete Guide to the Two Wishes Quest

Path of Exile 2 is packed with hidden secrets and rewarding side objectives that can be easily overlooked if you rush through the main storyline. One such hidden gem is the Two Wishes quest, a side activity found during the Interludes. Though it may seem simple at first glance, this quest involves collecting rare items and making a strategic choice that can significantly impact your character progression.

The Two Wishes quest can be discovered in the Interludes, where players will encounter two ancient Djinn pedestals. To interact with these pedestals, you must offer special quest items called Baryas. These items aren’t handed to you automatically-they are dropped by enemies within the Sel Khari Sanctuary, a central map area tied to this questline.

Since this side quest is tucked away, it’s easy to miss the required items if you focus solely on the main campaign. To complete the quest, you need:

Yoon’s Barya

Rangeen’s Barya

These function like other collectible drops in Path of Exile 2, but unlike random drops, Baryas are guaranteed if you fully clear the Sel Khari Sanctuary. Skipping monster packs can result in missed items, so a methodical approach is recommended.Unlock endless possibilities with the power of POE 2 Currency purchased with MMOexp!

Using the Baryas

Once both Baryas are collected, locate the corresponding Djinn pedestals in the Sel Khari Sanctuary. While map layouts are procedurally generated, the pedestals spawn in fixed regions:one in the southwest and one in the northeast. Placing the correct Barya on its matching pedestal will summon the associated Djinn and unlock the next stage of the quest.

Choosing Your Rewards

After offering a Barya, the Djinn presents three possible wishes:

1.Amulet-Receive four random rare Amulets and choose one.

2.Ring-Receive four random rare Rings and choose one.

3.Jewel-Receive three random rare Jewels and choose one.

Since the quest is completed twice (once per Barya), you can only select two out of the three categories, permanently losing the unchosen category for that playthrough.

General Reward Guidelines

Jewels:Most valuable. Provide build-defining bonuses that scale into the endgame and are harder to farm.

Amulets:Strong secondary choice. Can carry impactful modifiers and passive skills.

Rings:Least impactful but still useful if specific resistances or life modifiers are needed.

A reliable strategy is to pick a Jewel from one pedestal and an Amulet from the other, skipping the Ring entirely to maximize long-term value.

Tips for Completing Two Wishes

Clear the map thoroughly-Baryas only drop if all enemies are defeated.

Check pedestal locations carefully-Southwest and northeast chambers are fixed for Yoon and Rangeen.

Plan your rewards based on your build-If your gear already includes a strong Amulet, prioritize Jewels instead.

Leverage trading-If items are hard to obtain, using POE2 Currency for sale can speed up progress.

The Two Wishes quest may appear minor, but it offers meaningful choices and valuable rewards for careful players. By collecting Yoon’s and Rangeen’s Baryas, locating the pedestals, and making informed decisions on which rewards to claim, you can significantly strengthen your character for endgame content.

When exploring the Interludes, don’t overlook this side quest-properly completed, it’s one of the most rewarding hidden activities in Path of Exile 2. Prioritize Jewels and Amulets, and you’ll gain items that enhance your build far beyond the quest itself.

Continue Reading